CREATE SECURE FILE


Add Digital Content Files
- Upload content files to be included in the secure container. Drag and drop or click “Browse” to choose content files from computer or cloud storage.
- Digital content files names and sizes loaded to the container are listed here.
- Click “DELETE” to remove a content file from the container prior to encoding the secure file.
NOTE: Once a TERA container is encoded it cannot be modified.
Enable Download and Password Permissions
- Toggle switch to right to allow the recipient to download the TERA container content files.
- Passwords are optional. If password is designated, the recipient will be
required to enter the password prior to viewing the content.


References
- Click REFERENCES drop-down arrow.
- Type Reference Name description.
- Type the associated Reference Value.
- Click “+” to enable additional references.
Note: References are encoded in the file and cannot be changed. References can be used to specify File #, Case #, Document #, Document types, Programs, etc. References are helpful to search in the TERA files Library.


Container Name and Search Tags
- A default TERA file name will appear in the “Secure Container Name” field after content files have been loaded. This name can be edited. The Secure Container Name is visible in the TERA files library and reports.
- Designate search tags for the TERA container by typing the search word(s) and click enter. Search tags are very useful in finding a TERA Container file in the library.


Designate Authorized Viewers
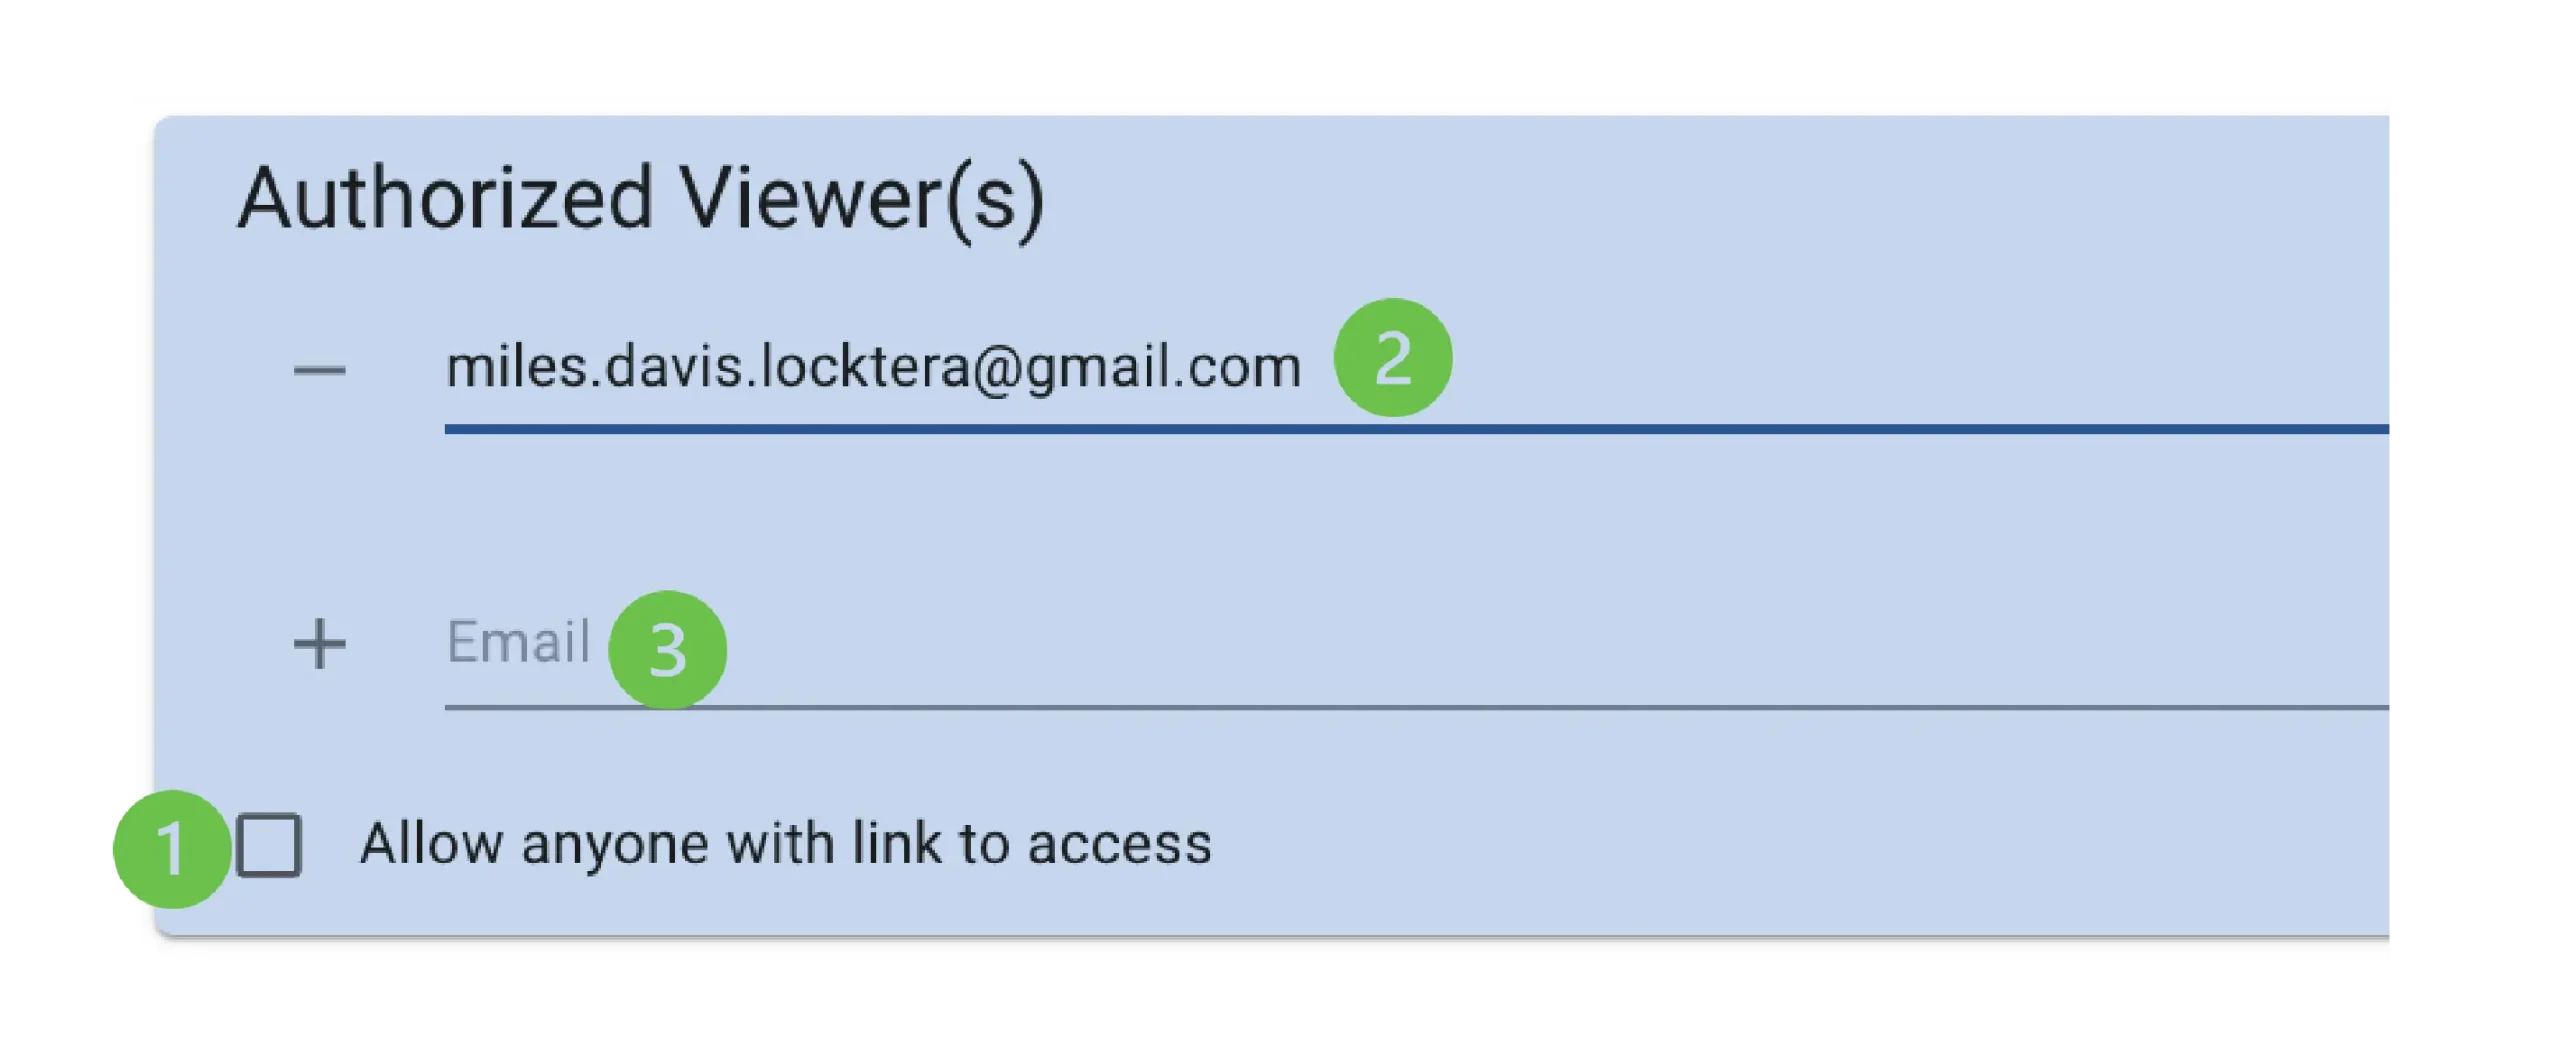
- Allow Anyone With Link To Access – Check box to allow anyone with the link to access the content. Viewers will be authenticated using their email address.
- To limit content access to specific authorized viewers, add email addresses to grant access.
- Email addresses saved in Contacts will auto-populate as the user starts typing.
To add additional emails, click “+”.
 FREQUENTLY ASKED QUESTIONS
Can I enter authorized viewer email addresses and allow access to any viewer with the link at the same time?
Yes. A user may choose to send a link to a TERA file to specific viewers email addresses with the intention that the authorized viewers may choose to share the content with other close contacts.
For example, this is valuable when a salesperson sends product presentations to a customer prospect for review. Because the TERA file is encoded to allow any viewer with the link to access the content, the initial customer contact can share the materials with decision makers within his/her organization.


Designate Access Date Range
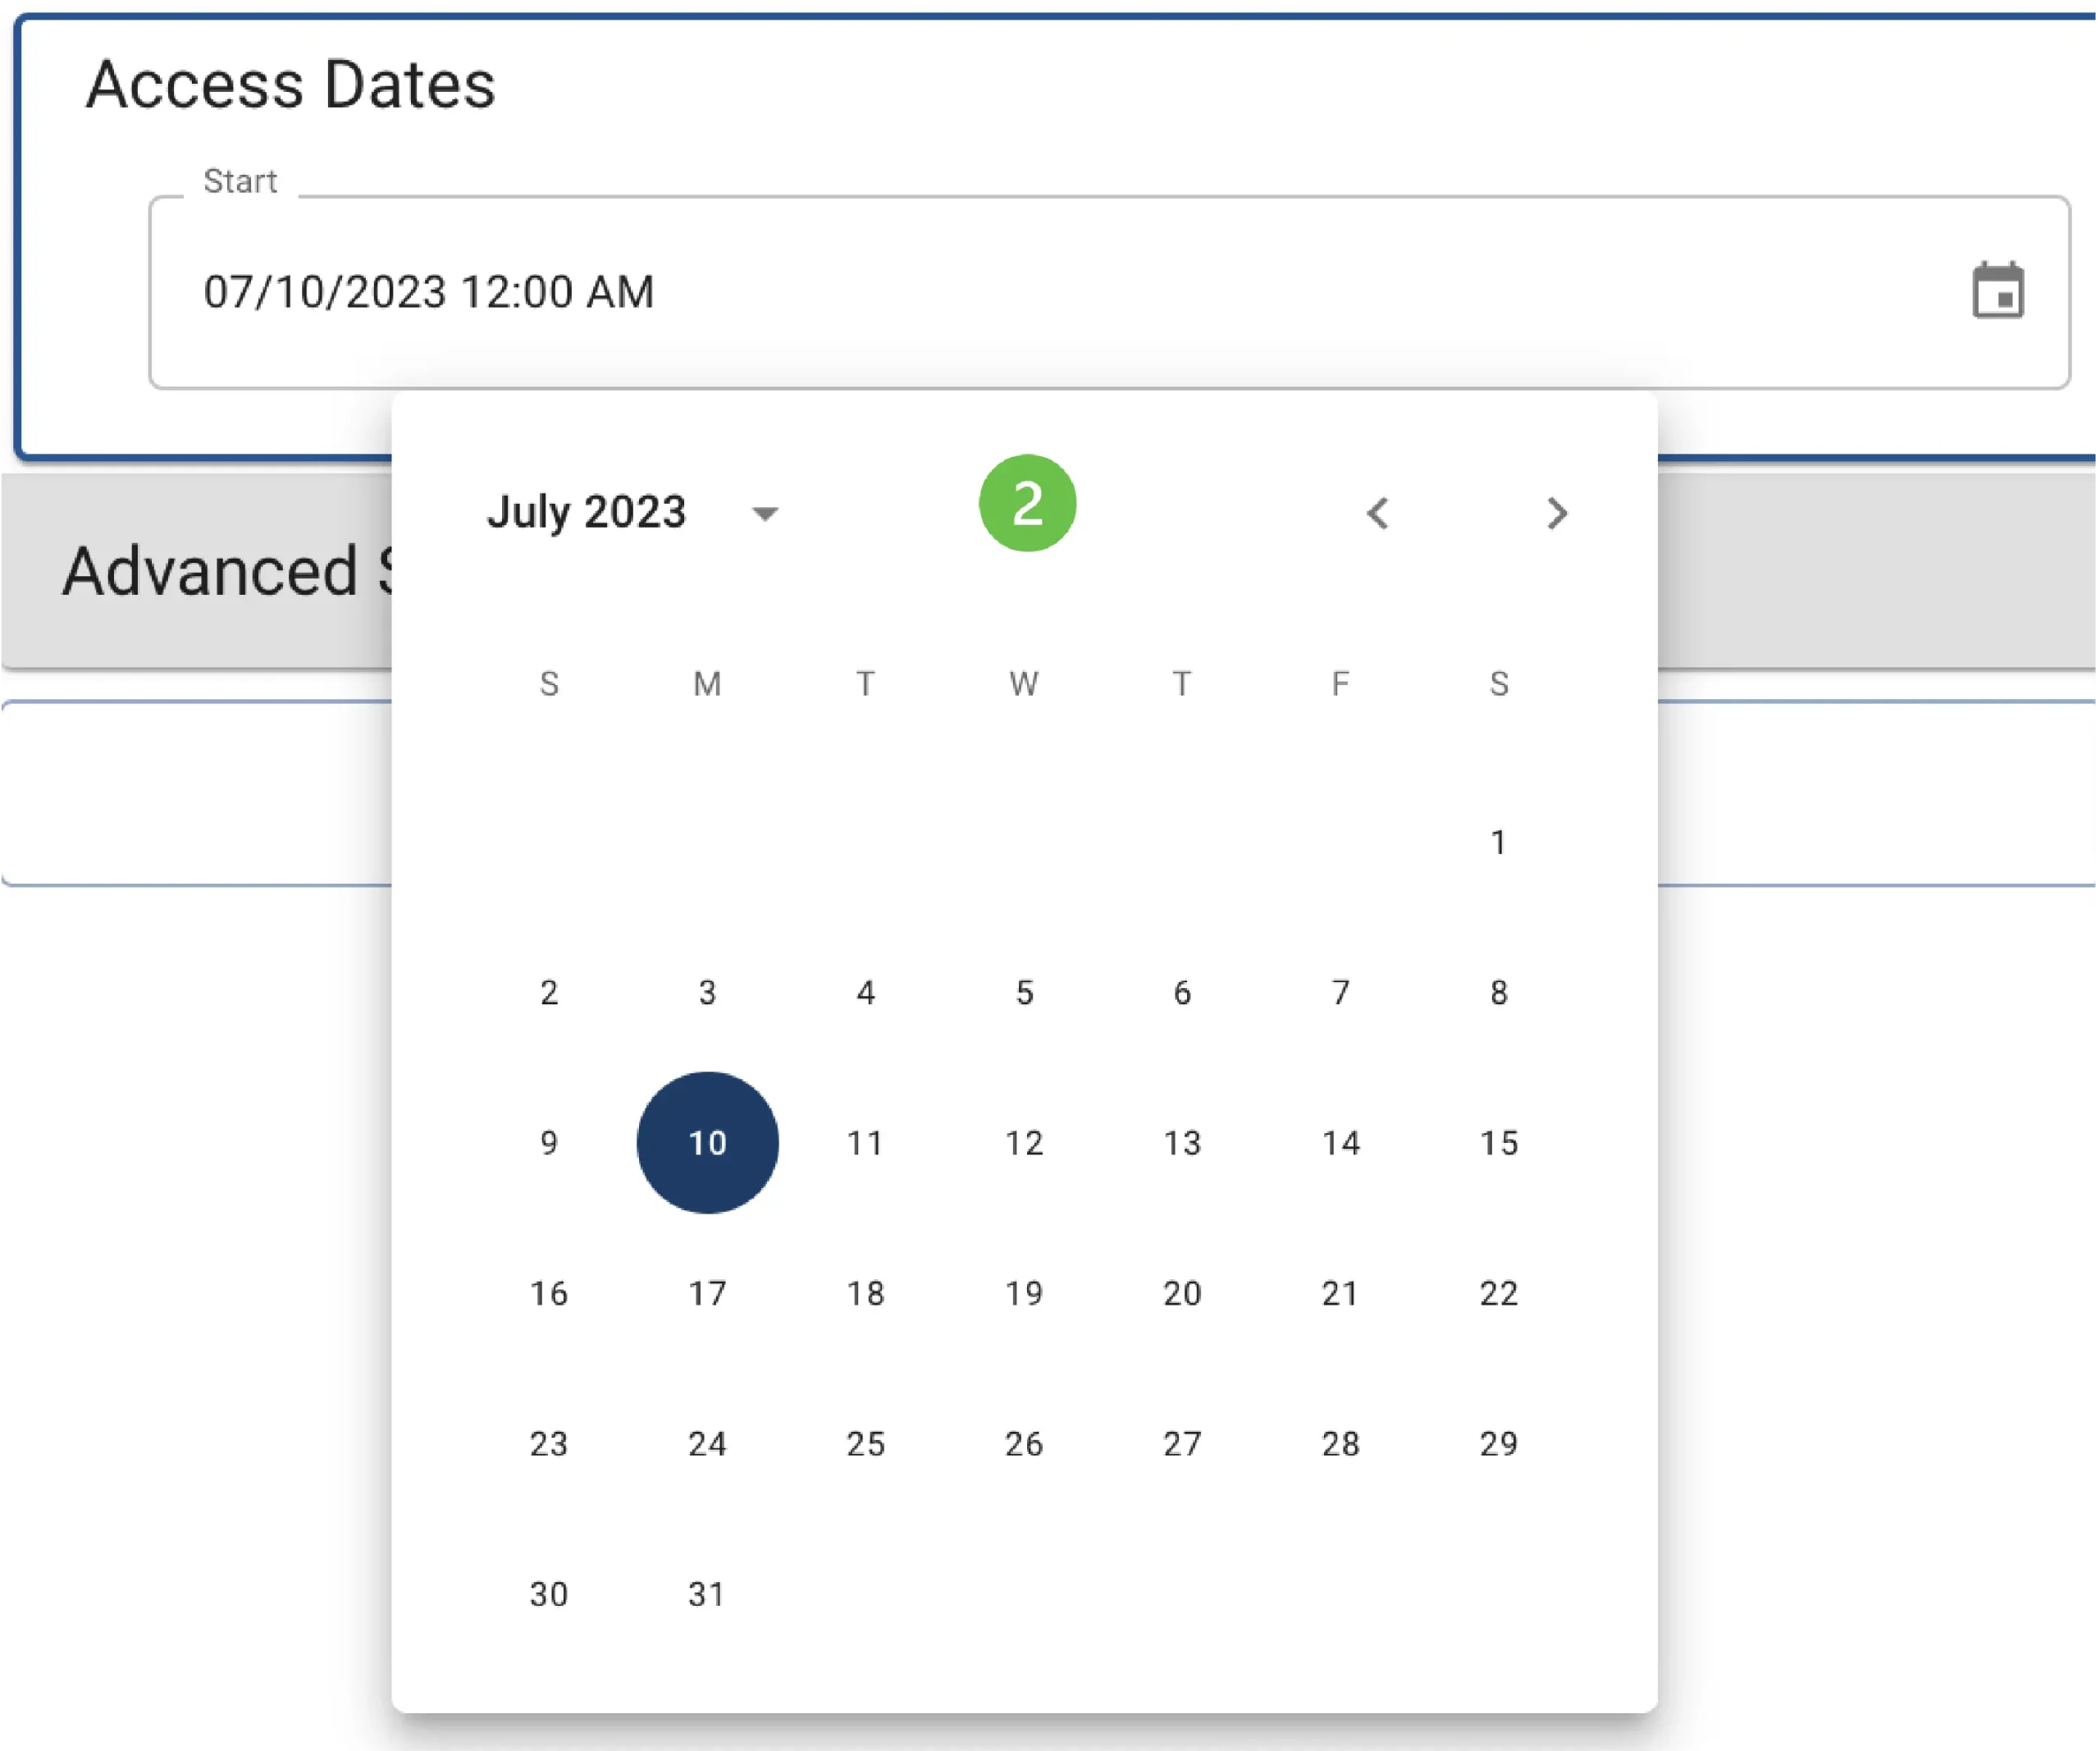
Limit access to specific date range.
- Click the Start Calendar icon.
- Click the access start date.
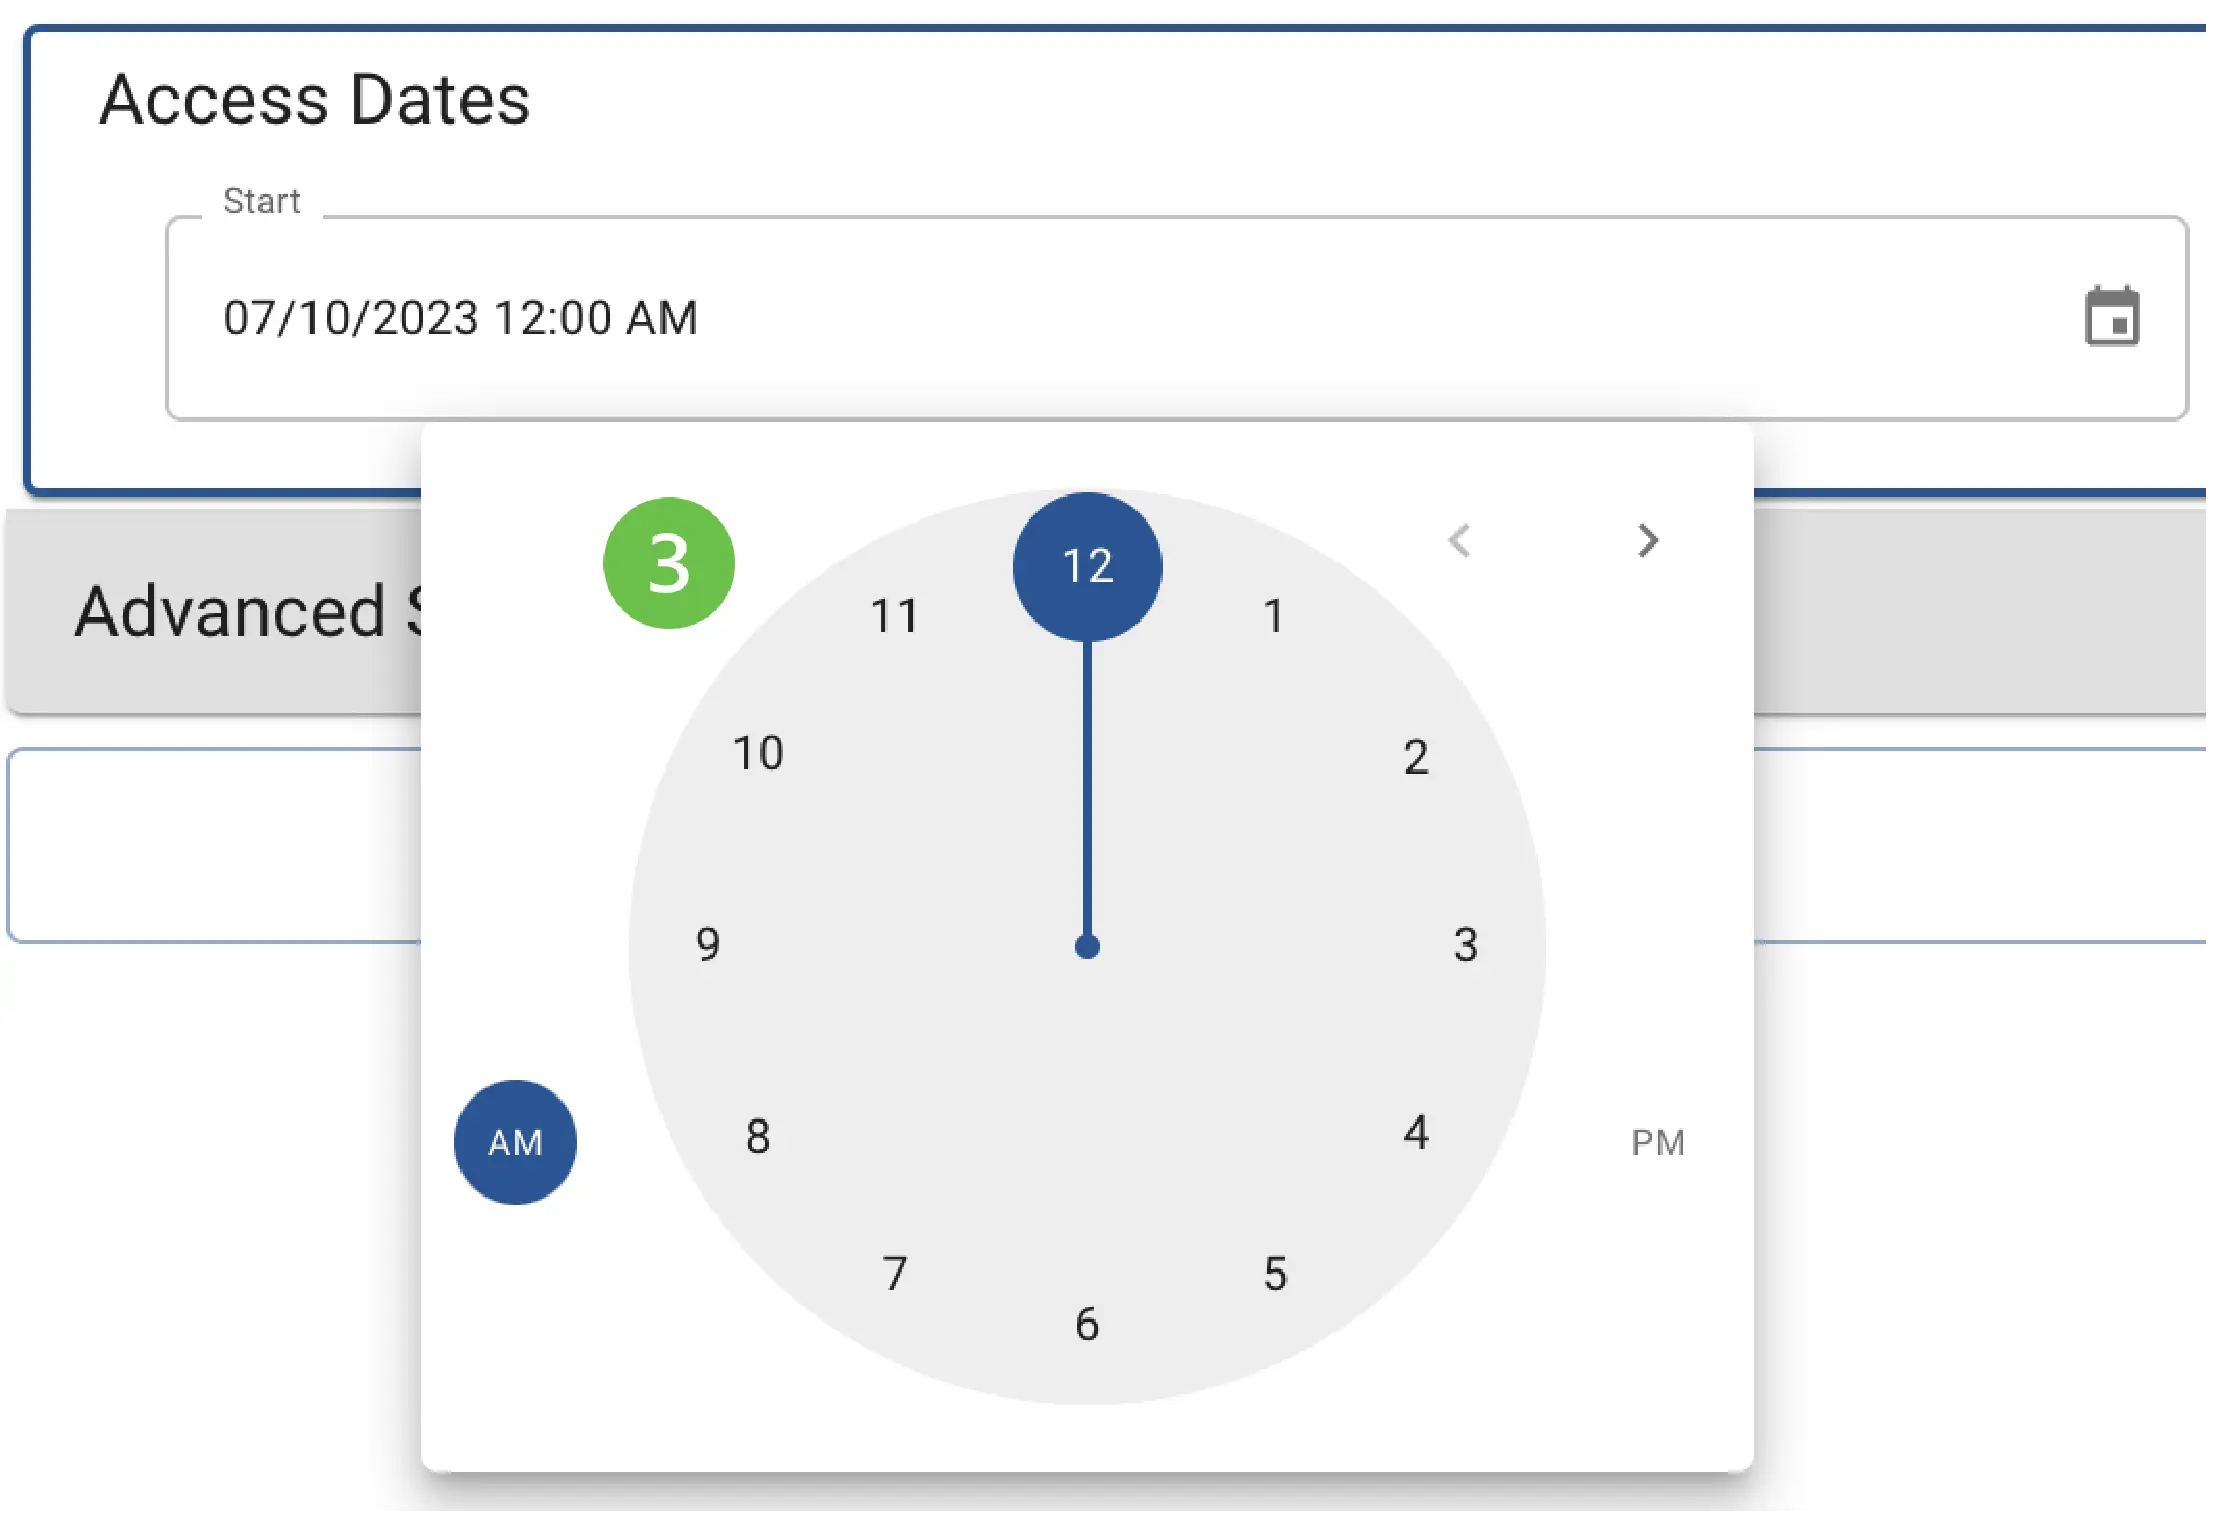
- Set the access start time.
- Click the End Calendar icon and set the end date and time.
Add Advanced Security Rules
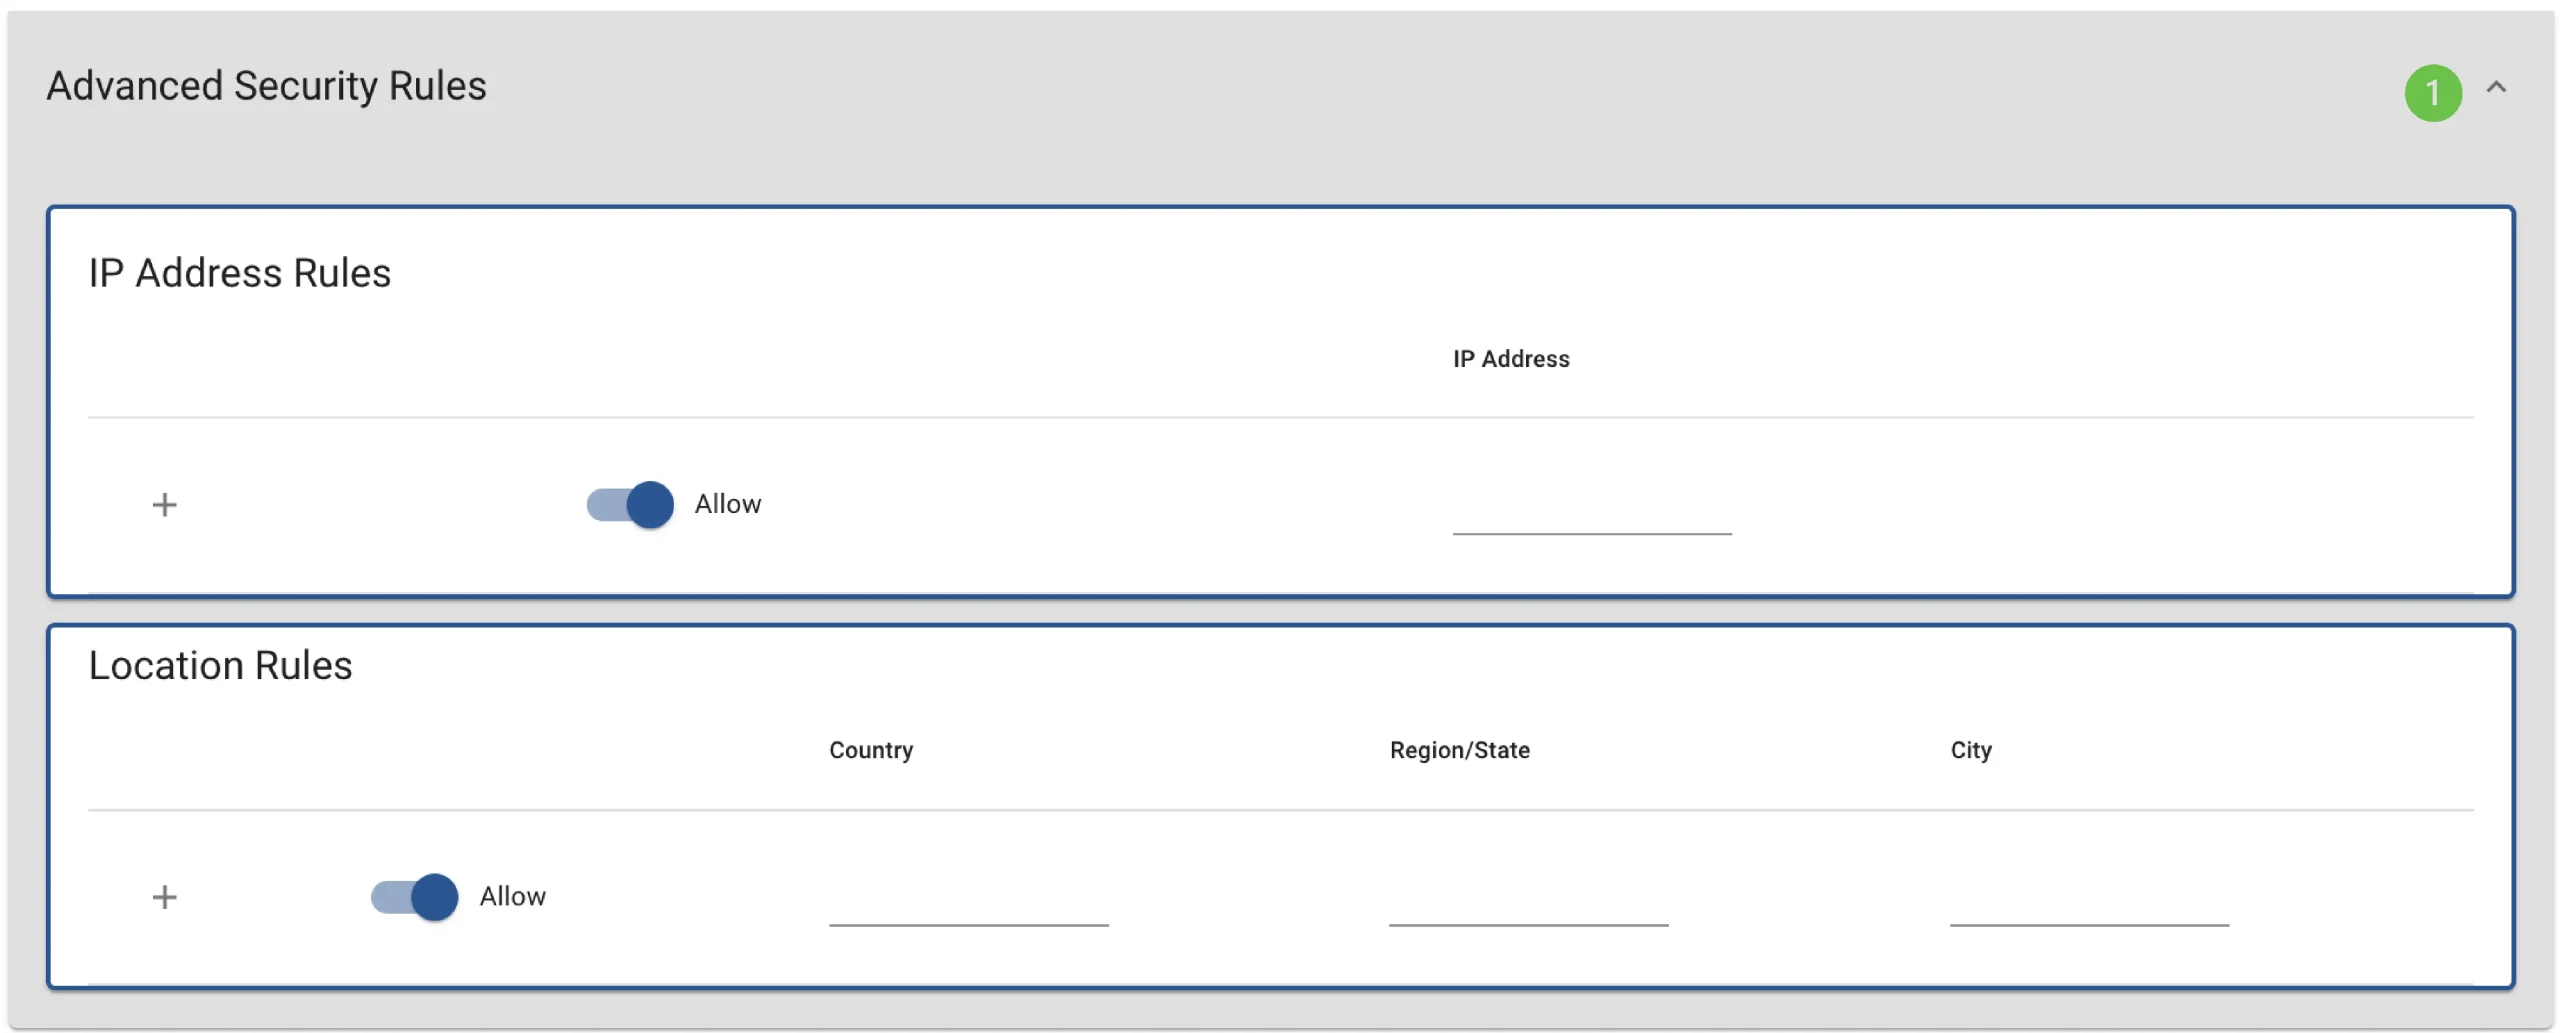
- Click dropdown option (arrow icon) to access Advanced Security Rules.


Add Allow IP Address Rules
- Toggle switch to right to set the rule to allow the designated IP Address to access the content. (NOTE: In many cases, IP Address can be used to limit access to those within an organization. Only viewers with specified IP address can access the content. Viewers that use VPNs will be identified by the IP Address acquired though VPN.)
- Designate allowed IP Address (format xxx.xxx.xxx.xxx)
- Enable additional IP Address to rules.
Add Block IP Address Rules
- Toggle switch to left to set the rule to block the designated IP Address from accessing the TERA container content. Using an IP Address to block access can be useful when a known unauthorized IP Address continues to try to access the content.
- Designate IP Address to block. (format xxx.xxx.xxx.xxx)
- Enable additional IP Address to rules.


Add Allow Location Rules
- Toggle switch to right to set the rule to allow the designated Location to access the content.
- From the drop-down options, choose the Country viewers are allowed to access file contents.
- From the drop-down options, choose the Region/State viewers are allowed to access contents.
- From the drop-down options, choose the City viewers are allowed to access file contents.
- Enable additional Location to rules.
NOTE: Viewers must have their location service enabled and must access the contents from the designated location.
NOTE: Viewers using VPNs or cellular phones to connect will register at the location of the VPN or closest cell tower for the cellular provider.


Add Block Location Rules
- Toggle switch to left to set the rule to block designated locations from accessing the content.
- Choose Country from drop-down viewers are blocked to access file contents.
- Choose Region/State from drop-down viewers are blocked to access contents.
- Choose City from drop-down viewers are blocked to access file contents.
- Enable additional Location to rules.
Create Secure Link
- Click “Create Secure Link”.
NOTE: Large files will take longer to encode. Files up to 2 GB can be encoded.


Freuqently Asked Questions
1. Can I change Viewer Permission Rules after I encode the secure TERA File?
No. Once the TERA file is encoded, it is immutable and cannot be changed. This is the foundation of the file level security. To change viewer permission rules, create another TERA file with the content.
2. Can a Viewer forward the link to other recipients to access the TERA container?
Yes and No. Yes, if “Allow anyone with link” was checked when encoding the file. Otherwise only designated authorized viewers will be able to access the TERA container.

Quick Tips
References
References are encrypted into the file security and are not visible to the viewer. References help users locate containers with the referenced content. References often are included in an organizations procedures. Multiple references can be added to each TERA File. Some examples include:
Case#: 12345
ID: AB1234C
Attorney: Smith
Campaign: Superbowl Promotion

